


These Biscoff dessert cups are one of my favorite desserts when I want something quick, creamy and full of Biscoff flavor. They combine crunchy Biscoff cookie crumbs with a light cheesecake-style filling made with cream cheese, Biscoff cookie butter and whipped cream.
And the best part? You only need four main ingredients and there is no oven involved.

These individual no-bake cheesecake desserts take just minutes to prepare, making them perfect for a dinner party, holiday meal or any time you need a simple dessert without spending hours in the kitchen.
I also love serving desserts in individual glasses. Everyone gets their own portion, they look festive without requiring much decoration, and you can prepare the filling ahead of time. This recipe is especially useful when you're cooking for a group because you can make six individual dessert cups at once.
If you're a Biscoff fan, you might also like my Biscoff Baked Oats, which combine Biscoff cookie butter with coffee for an easy breakfast.
What are Biscoff dessert cups?
These Biscoff dessert cups are individual layered desserts made with Biscoff cookies and a no bake Biscoff cheesecake filling.
You'll also see them called Biscoff cheesecake cups, Lotus dessert cups, Lotus Biscoff dessert cups, speculoos dessert cups or Biscoff dessert jars.
What I like about this version is that you don't need to make a separate cookie crust with melted butter. The cookies stay as crumbs, which means you can control how much crunch you get in every bite.
Why these Biscoff dessert cups work
There are plenty of Biscoff cheesecake cup recipes that use a cookie crust made with crushed cookies and melted butter, followed by a cheesecake filling and sometimes an additional layer of melted Biscoff spread.
This recipe takes a simpler approach.
The Biscoff cookies aren't pressed into a firm crust. Instead, they're layered loosely between the cheesecake filling. This gives you a noticeable contrast between the creamy filling and the cookie crumbs.
It also means you can choose the texture you want.
Serve them shortly after assembling and the cookie crumbs will still have plenty of crunch while the filling is light and airy.
Refrigerate them for several hours and the cookies soften slightly and absorb some of the moisture from the filling. The dessert becomes firmer and more cohesive, almost like a spoonable no-bake cheesecake.
Neither version is wrong, they are both delicious (I tried!) It's simply a different texture.
Ingredients for Biscoff dessert cups
You only need four main ingredients for these speculoos dessert cups.
Biscoff cookies provide the crunchy layers and that familiar caramelized, cinnamon-spiced flavor. Lotus Biscoff cookies are the obvious choice, but other speculoos cookies can work too. If you're in the U.S., Biscoff cookies are widely available in supermarkets.
Cream cheese forms the base of the cheesecake layer. Use full-fat, brick-style cream cheese rather than whipped or spreadable tub-style cream cheese. The firmer texture gives the filling more structure. Let it come to room temperature before mixing so you don't end up with lumps.
Biscoff cookie butter gives the filling its main flavor. Both smooth and crunchy Biscoff spread work. Smooth spread gives you a more uniform, creamy filling, while crunchy spread adds tiny pieces of cookie for extra texture.
Whipped cream lightens the cream cheese and cookie butter mixture. I use ready-made whipped cream when I want this dessert to be as quick as possible, but you can absolutely whip your own heavy cream.
If you're making your own whipped cream, use 1 cup heavy whipping cream with 2 tablespoons granulated sugar and whip until firm peaks form.
Creamy or airy? You can choose
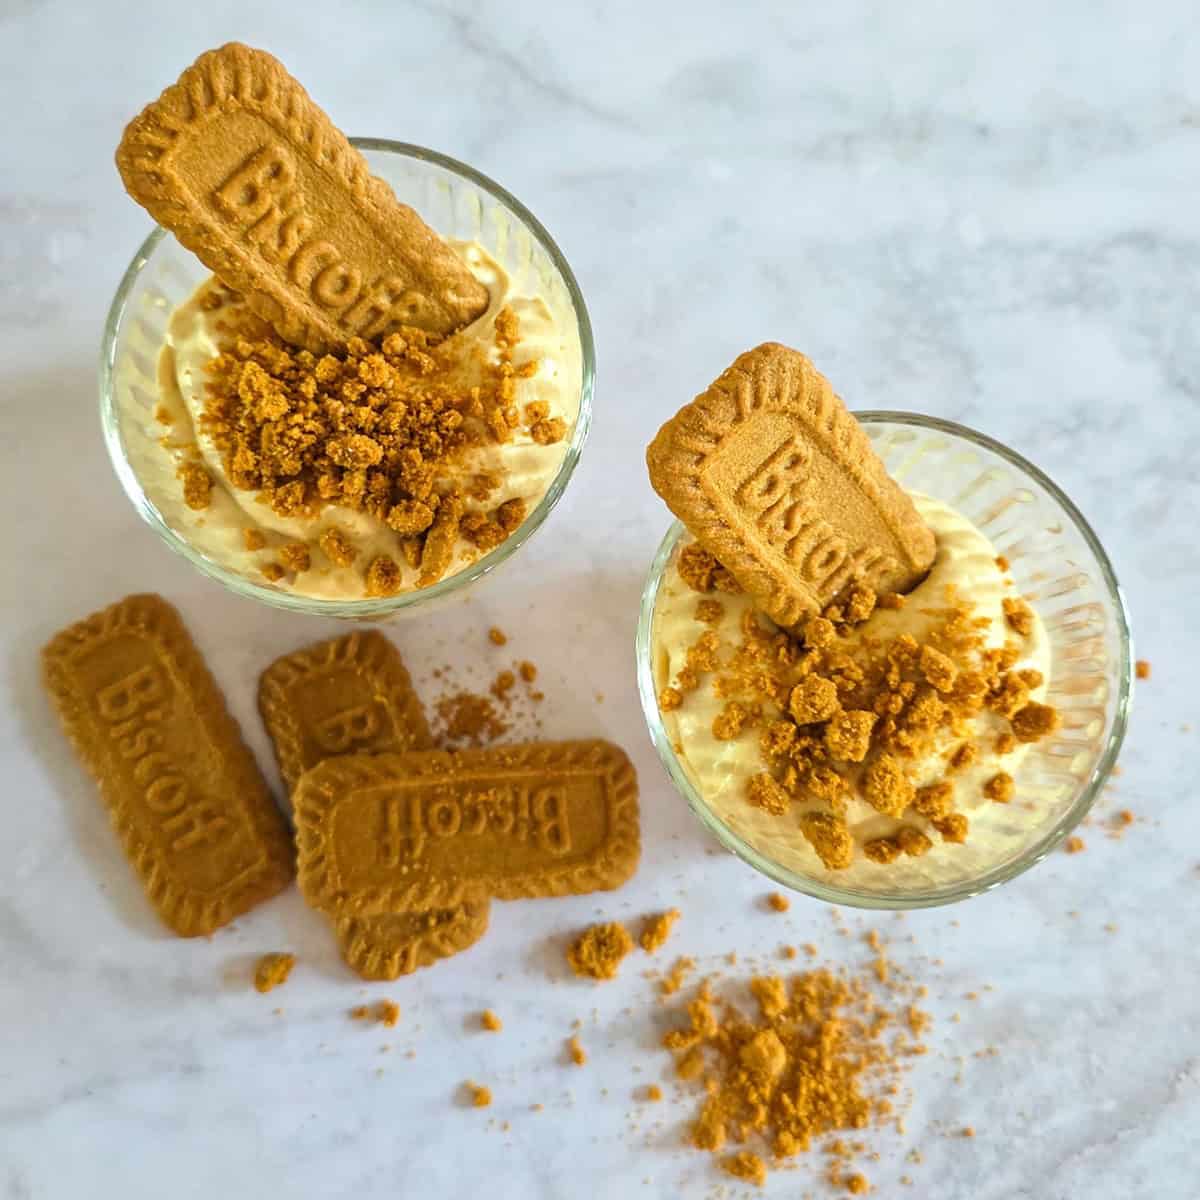
One of the things I particularly like about these Biscoff dessert cups is that you can decide when to serve them.
For the lightest and airiest filling, assemble the dessert shortly before serving. The whipped cream keeps the cheesecake layer light, while the cookie crumbs retain their crunch.
For a firmer no-bake cheesecake dessert, refrigerate the assembled cups for at least 4 hours. The filling becomes more set and the cookie crumbs soften slightly.
This is also useful when you're planning a dinner party. You can prepare everything ahead of time and simply accept that the cookies will be softer.
If crunch is important to you, keep some cookie crumbs aside and sprinkle them over the top just before serving.
How to keep the Biscoff crumbs crunchy
Cookie crumbs naturally soften when they come into contact with a moist filling. That's not a mistake, it's simply what happens when you assemble a layered dessert ahead of time.
If you want crunchy Biscoff dessert cups, assemble them as close to serving time as possible.
You can also prepare the cheesecake filling a day ahead, cover it and refrigerate it. Crush the cookies separately and store them in an airtight container. Then layer everything shortly before serving.
And don't add the whole Biscoff cookie garnish until the last moment. A cookie sitting on a moist cheesecake filling for several hours will become soft.
If you actually prefer a softer, more cheesecake-like texture, prepare the complete dessert several hours ahead. That's one of the advantages of individual dessert cups: you can make them exactly the way you like them.
How to make Biscoff dessert cups for a dinner party
If you're serving these for a dinner party, I recommend preparing the cream cheese filling in advance.
Bring the cream cheese to room temperature and mix it with the Biscoff spread until smooth. Cover the bowl and refrigerate it for up to a day.
When you're ready to serve, briefly whisk the filling if it has become very firm, then fold in the whipped cream.
Crush the Biscoff cookies separately and assemble the dessert cups just before your guests sit down.
For a more polished presentation, use small clear glasses so you can see the layers. You don't need special dessert glasses. Small drinking glasses, tumblers or jars work perfectly.
How much should go into each glass?
This is worth paying attention to when you're serving these at a dinner party.
Don't make the glasses too large. These Biscoff dessert cups are rich, and a small individual portion is usually enough after a full meal.
I like using small dessert glasses and dividing the cookie crumbs and filling evenly between six portions. A small cookie scoop or tablespoon measure can help you get similar layers in every glass.
This also makes the dessert look more professional when you serve it to guests.
Substitutions for Biscoff dessert cups
Don't have exactly the ingredients listed? Here are some easy swaps.
Biscoff cookies: Use another crisp speculoos cookie. In the Netherlands, Bastogne cookies are a natural alternative. In the U.S., look for other crisp spiced cookies if Biscoff isn't available.
Biscoff spread: Another cookie butter can be used, although the flavor will be slightly different.
Cream cheese: Full-fat brick-style cream cheese gives the best structure. Reduced-fat cream cheese can work, but the filling may be softer.
Whipped cream: Homemade whipped cream is an excellent alternative to ready-made whipped cream. You can also adjust the sweetness depending on how sweet your cookie butter is.
I wouldn't replace the cream cheese with a much softer dairy product such as Greek yogurt without changing the recipe. The cream cheese provides the structure that makes these dessert cups feel like a no-bake cheesecake.
Can you make these Biscoff cups in one large dish?
Yes.
Instead of individual glasses, layer the cookie crumbs and Biscoff cheesecake filling in one larger serving bowl or dish.
The dessert won't have quite the same presentation, but it's a useful option when you're serving a crowd. Simply spoon portions into small bowls when you're ready to serve.
For a buffet, I actually prefer the individual cups because guests can grab one without having to portion the dessert themselves.
Leftover Biscoff cookies and cookie butter
If you have Biscoff cookies left after making these dessert cups, don't worry, they're useful in plenty of recipes.
You can crumble them over yogurt or ice cream, use them as a cheesecake topping, or make my Biscoff Baked Oats.
Leftover cookie butter is also useful for spreading on toast, swirling through oatmeal or adding to another no-bake dessert.
And if you like desserts served in individual glasses, take a look at my Coffee Custard Cups. They're completely different in flavor but use the same idea of a small, individual dessert that's easy to serve.
Can you freeze Biscoff dessert cups?
I don't recommend freezing the fully assembled dessert.
The whipped cream and cream cheese filling can change texture after freezing and thawing, while the Biscoff crumbs can become soft.
If you need to prepare these ahead, the better option is to make the cheesecake filling up to a day ahead and keep it refrigerated. Crush the cookies separately and assemble the dessert shortly before serving.
That gives you most of the convenience of a make-ahead dessert without compromising the texture.
A simple dessert for any occasion
These Biscoff dessert cups are proof that a good dessert doesn't need a long ingredient list or an oven.
They're quick enough for a weeknight but look special enough for a dinner party. You can make them light and crunchy by serving them shortly after assembly, or prepare them several hours ahead for a firmer, softer no-bake cheesecake texture.
And if you already have Biscoff cookies and cookie butter in your pantry, you're only a few minutes away from dessert.
Frequently Asked Questions
You can make the cheesecake filling up to one day ahead. For the best cookie texture, assemble the dessert cups shortly before serving. If you don't mind softer cookie crumbs, you can assemble the complete dessert up to about 4 hours ahead.
The most common reason is that the cream cheese mixture doesn't have enough structure. Use full-fat, brick-style cream cheese rather than a whipped or very soft cream cheese product. Also make sure your whipped cream is properly whipped before folding it into the filling.
You can make Biscoff dessert cups with other creamy ingredients, but they will no longer have the same cheesecake-style filling. Cream cheese gives this version its characteristic cheesecake flavor and helps the dessert hold its shape.
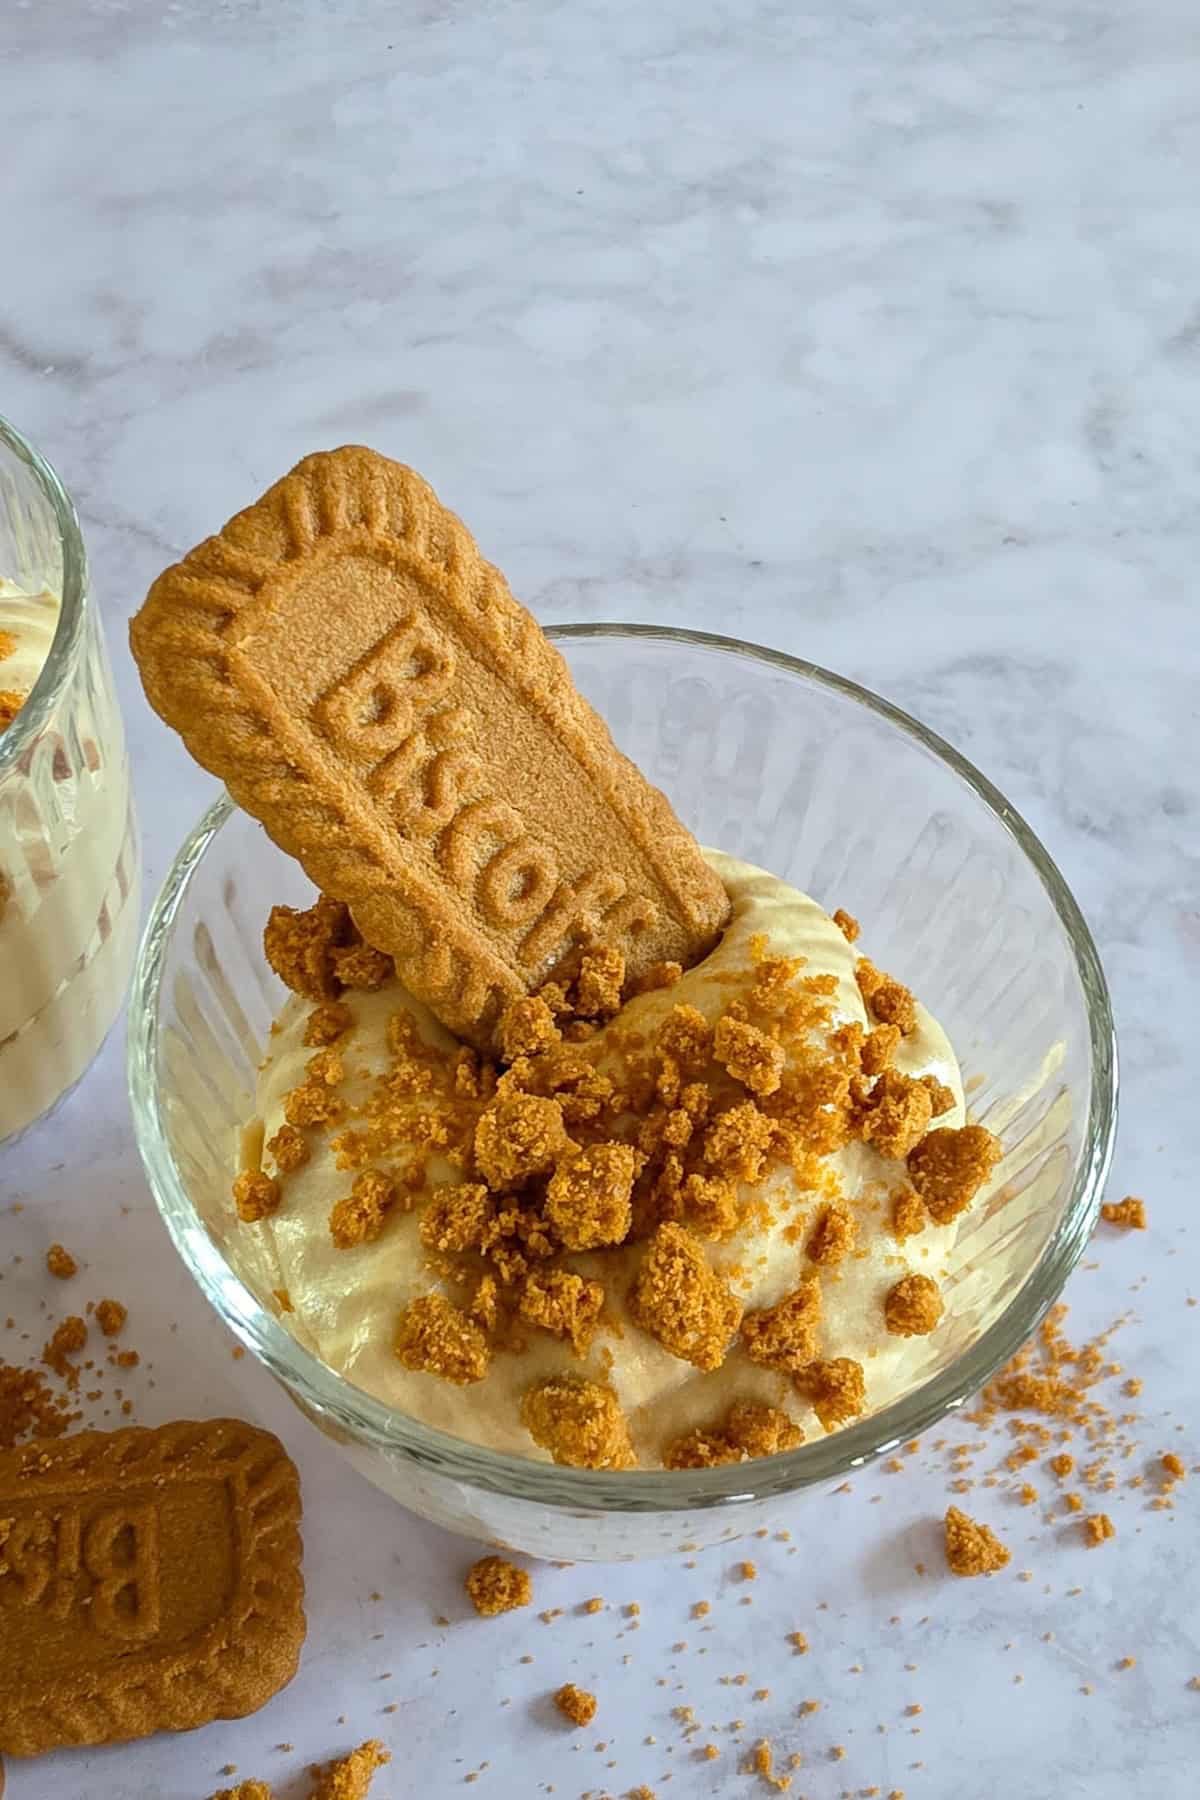

Biscoff Dessert Cups
Equipment
- mixing bowl
- Electric mixer
- 6 Small dessert glasses
- food processor (or resealable plastic bag and rolling pin)
Ingredients
For the Biscoff dessert cups
- 5.3 ounces (150 g) Biscoff cookies , plus 6 whole cookies for serving
- 7 ounces (200 g) full-fat cream cheese , softened to room temperature
- 6 tablespoon Biscoff cookie butter
- 2 cups ready-to-use whipped cream
If making your own whipped cream:
- 1 cup heavy whipping cream
- 2 tablespoon granulated sugar
Instructions
- Crush the cookies. Place the Biscoff cookies in a resealable plastic bag and crush them with a rolling pin, or pulse them briefly in a food processor. Keep the crumbs slightly coarse rather than turning them into a fine powder.
- Make the Biscoff cheesecake filling. Let the cream cheese come to room temperature. Beat the cream cheese and Biscoff cookie butter together until completely smooth and creamy.
- Add the whipped cream. Gently fold the whipped cream into the cream cheese mixture. Mix only until combined. Overmixing can make the filling less light and airy.
- Layer the dessert cups. Divide some of the cookie crumbs between six small glasses. Add a layer of Biscoff cheesecake filling, followed by another layer of crumbs. Repeat until all the ingredients have been used, finishing with cookie crumbs.
- Garnish and serve. Place one whole Biscoff cookie in each glass just before serving.
- For a firmer dessert: Cover and refrigerate the assembled cups for at least 4 hours before serving. Add the whole cookie garnish just before serving.
Video
Notes
- For the best crunch: Assemble the dessert shortly before serving. If you prepare it several hours ahead, the cookie crumbs will soften slightly.
- Make ahead: The cream cheese and Biscoff filling can be prepared and refrigerated up to 1 day ahead. Assemble the cups just before serving.


Leave a Reply